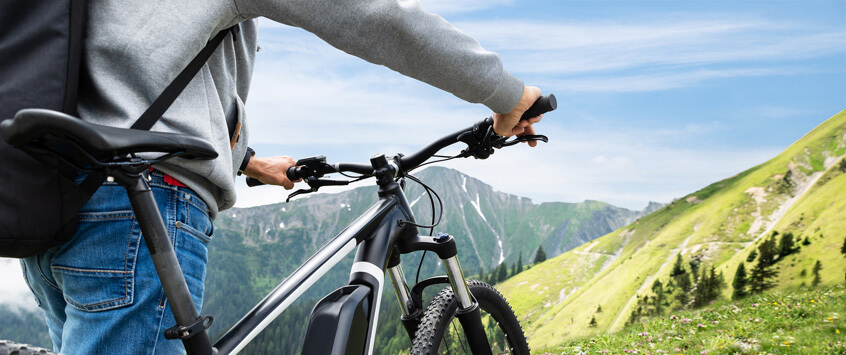
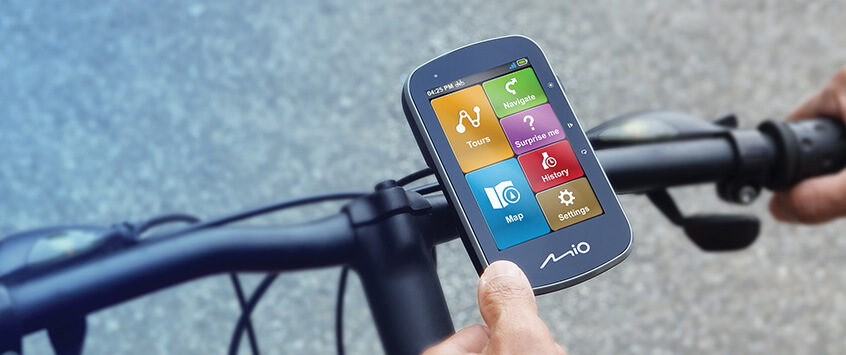
Start your first ride
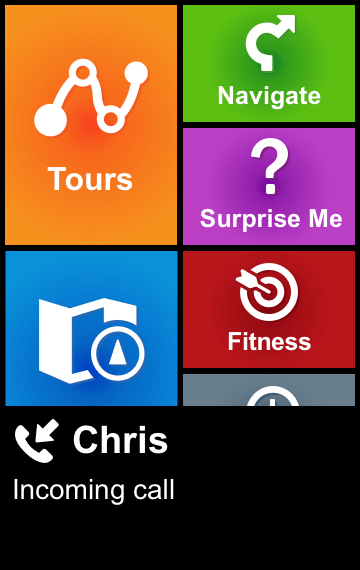
Cyclo supports various route planning options. You can simply set a starting destination or use "Surprise Me" to have Cyclo decide where you want to go.
Setting the profile to choose the correct route plan
First things first, create or change a profile for each of your activity types. Each profile can be assigned a different bike or any other activity. This can be helpful in many ways, here are several reasons why. If you have multiple bikes, you'll need different wheel circumference values setups for each bike in order to correctly calculate speed and distance. In addition, multiple profiles allow two riders who differ in weight, age and gender to share a bike, so Cyclo can more accurately calculate the calories of each cyclist.
To edit the default profile:
- Open the Settings menu
- Choose Profiles
- If Default has been selected, click the edit icon in the lower right corner of the screen.
- Change the name, date of birth and other values
A verified profile cannot change the type again, as this affects your historical data. You can create a new profile to change the type.
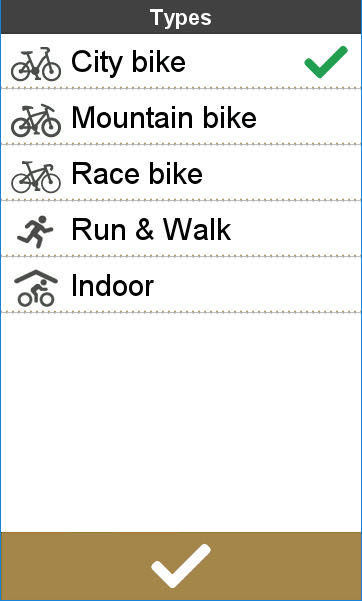
The routing can be customised for each type.
To edit the route planning:
- Open the Settings menu
- Select Routing
- Select the type of routing you wish to modify by clicking on "Choose type" in the dropdown menu.
This setting allows you to set the route planning preferences by selecting "Prefer", "Allow" or "Try to avoid".
For information about default route plan settings, see the following table:
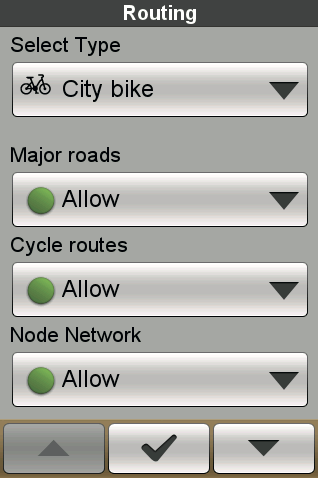
Routing setting page
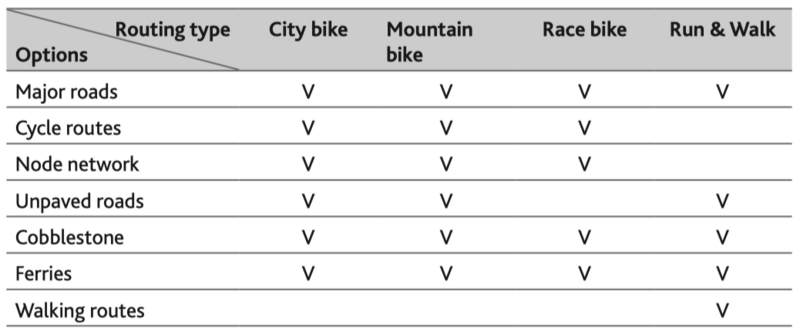
Routing option table
Navigation
If you know where you want to go
Your device is equipped with maps that provide street information for navigation, including POIs (places of interest) such as bike shops, restaurants, emergency stations, and more.
If you choose "Navigate", there are several ways to choose your destination. For example, you can press the "Address" button to determine your destination by searching for the desired address.
Navigate to home
If you want to navigate home for the first time and have not yet entered a home address yet, you will be prompted to search for an address using the Home setup wizard.
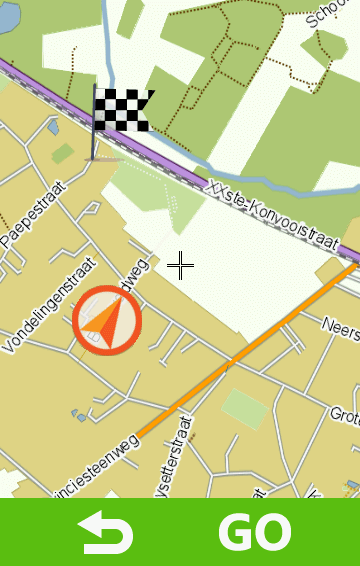
As soon as your home address is stored, simply press "GO" on the screen and you will be navigated home as quickly as possible.
Search location by address
This is the simplest method.
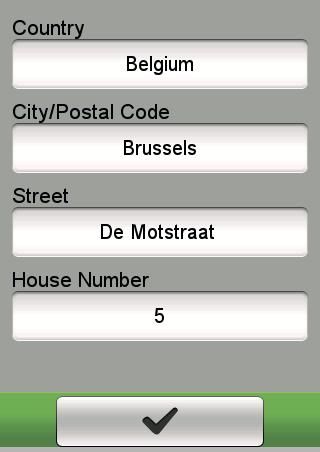
To set an address:
- Select Address
- Enter Country, City / Postal Code, Street, House Number
House number is optional, if this section is empty, Cyclo will take you to the middle of the street.
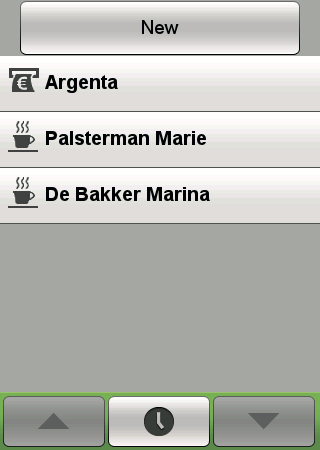
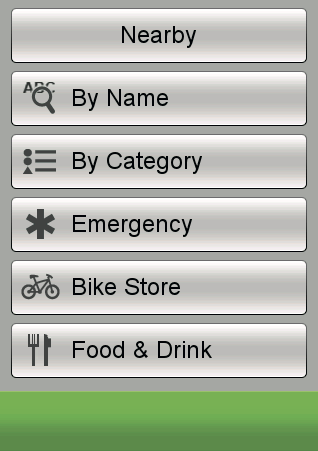
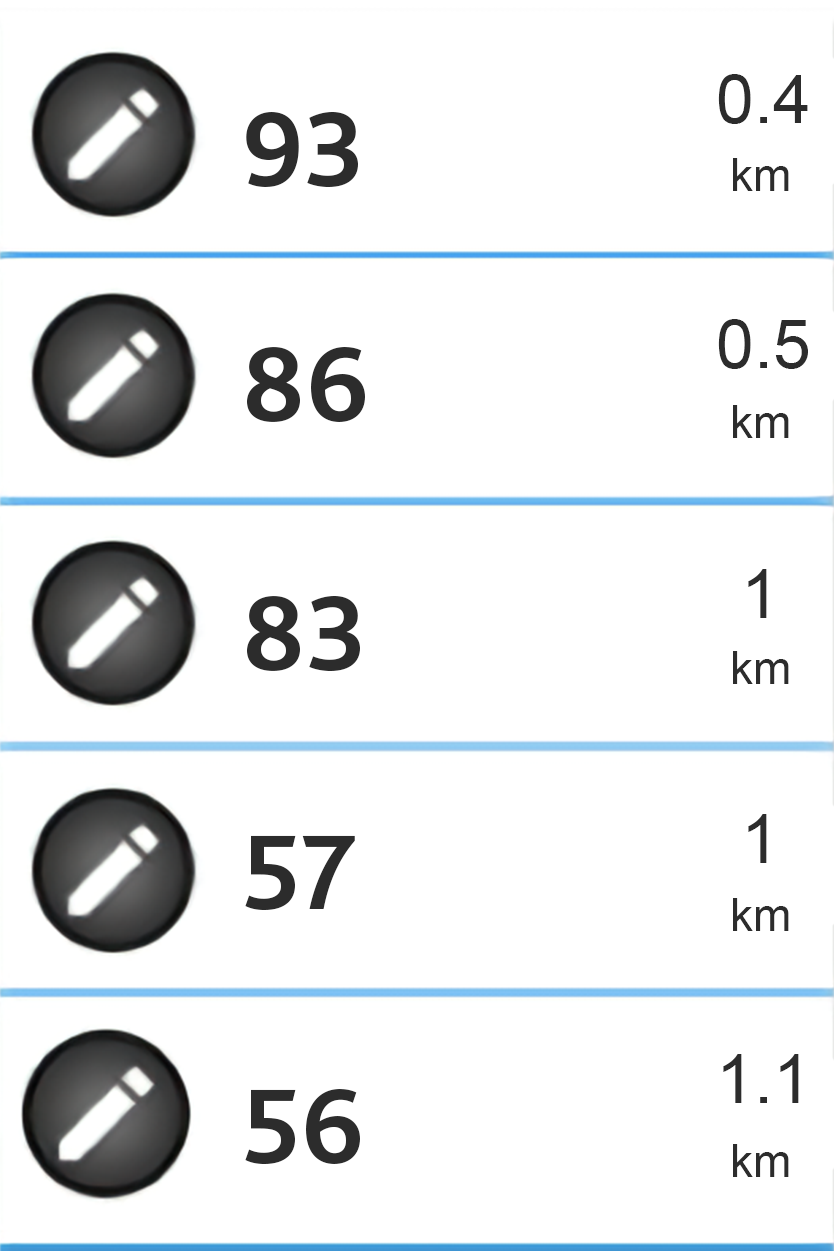
Search for places of interest (POI)
If you have previously searched for POIs, they will be displayed. Simply click on the POI you are looking for or press "New" to find other POIs. The search results are based on the settings made. Press the "Nearby" button and then select Nearby or City:
Nearby: Search for POIs near your current location
City: Search for POIs in a specific city
When the search result is selected. You can use "By Name" (keyword) or "By Category" to find a POI. The most common categories that have been listed for you in advance are: Emergency, Bike shop, and Food Drink.
Navigate to a point on the map
You can define a destination simply by marking a point on the map. If you don't know the exact address or coordinates, this is the easiest way to get to your destination.
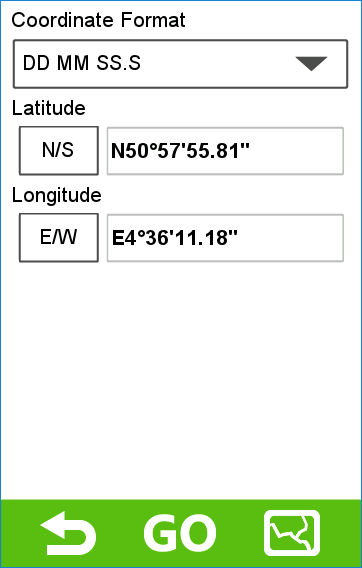
Coordinate
You can manually enter the coordinates of your destination. Click the Longitude and Latitude fields to enter the coordinates of your destination.
Other navigation options
The "Back to start" function enables your device to take you back to the start point.
Note: This function is only available when the recording mode is switched on.
Let yourself be inspired
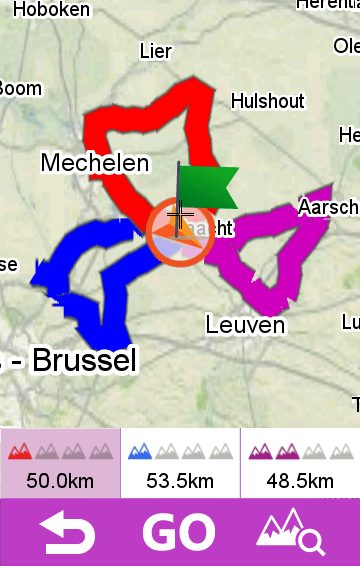
The device has the Surprise Me™ function, which will offer you up to three exciting routes around your location.
If you have already taken a route from the same location, the device will try to suggest different routes based on the possible and available roads around your current location. So you will always be offered different routes.
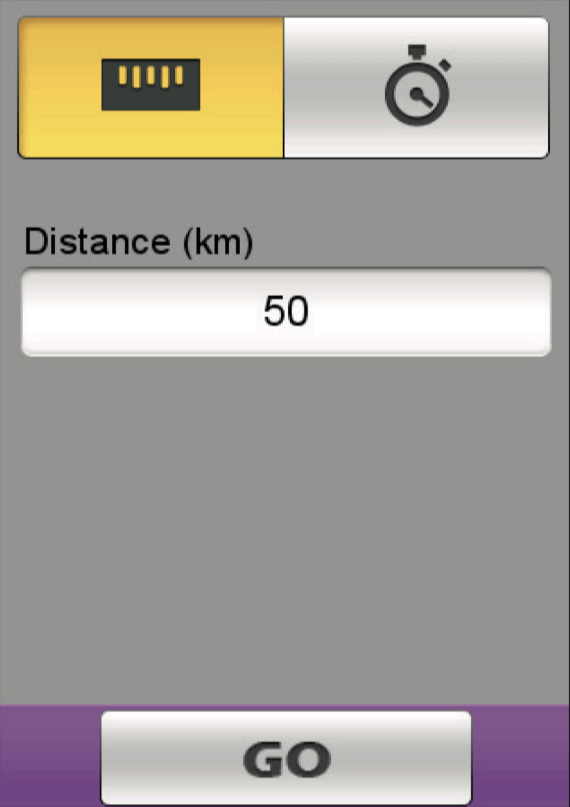
To start Surprise Me™:
- Press the 'Surprise Me' button in the start menu
- Set by Distance or Time
- Enter the total distance or total time you want to travel.
Mark your location
You can mark your current location as a POI in your track record under recording mode.
To mark a POI:
- Add map view and start recording
- Press the button "Mark POI"
- Confirm with "Yes" at the prompt dialogue.

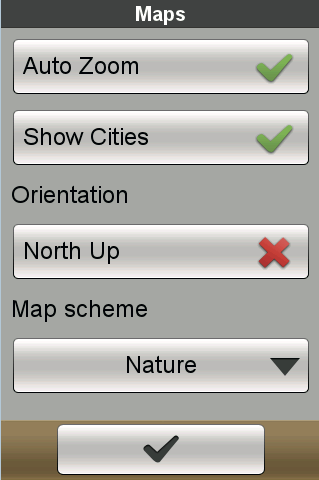
Customize the map view
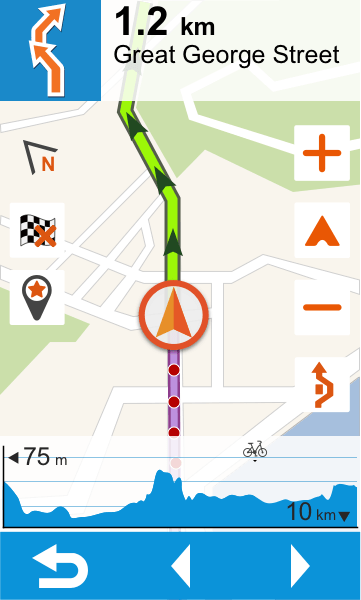
The map display impacts the navigation experience. It can be adjusted by the Maps setting.
To edit the Maps setting:
- Open the Settings menu
- Select Maps (you may need to tap the right arrow in the lower right corner of the screen to find it)
Auto zoom: Enable or disable automatic zoom during navigation.
If selected, the map screen automatically zooms in or out, depending on your speed, for an optimal view of your route.
Show cities: show or hide the current city name on the navigation screen.
Orientation: Toggle the map view to be facing North upwards or disable to (Lane up).
Map scheme: select the desired map display style.
Plan your tour
Whether you are cycling through small villages in rural France, exploring the sights of a big city like Amsterdam or driving through the Swiss Alps - with the new 'NeverMiss' function you can plan your tour optimally.
To start planning a tour route:
- Go to www.mioshare.com
- Log in. If you don't have a user account yet, create a new user account.
- Go to Explore tab and choose 'Create' to go to the create page
Create a new route
Simply draw a route from A to B
Don't know where you want to go? The Cycling Trails function can help you with this.
Using Cycling Trails:
- Click on the icon at the top right corner of screen
- Tick on 'Cycling Trails' box.
You must zoom in on Nodes to see numbers. The Node Network is popular in the Netherlands, Belgium and part of Germany.
Or you can use the search box to search for a place of interest or city to start.
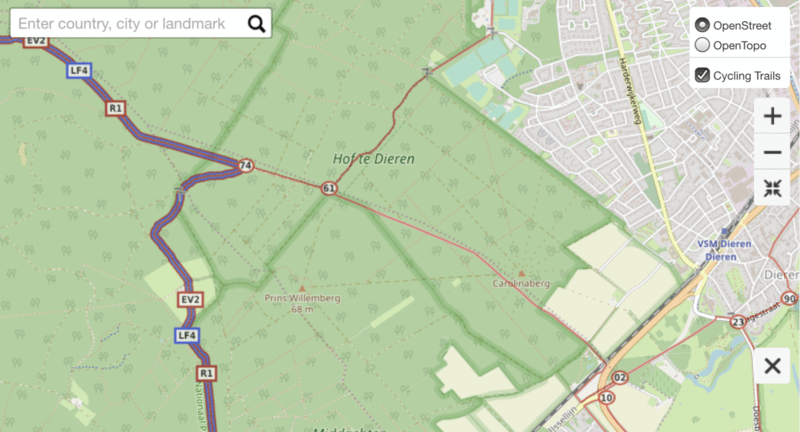
Drawing a route:
- Click on the desired location on the map to select the starting point.
- Click on another location to create the second point.
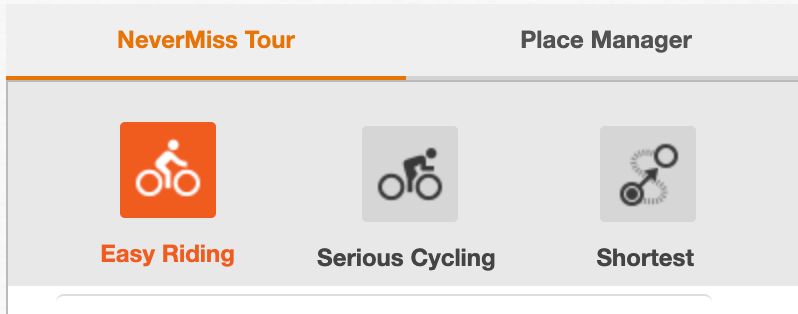
- A route is generated accordingly to the 'Route type setting'. You can choose between Easy riding, Serious cycling or Shortest route. You can include the elevation profile to select the type you want.
The MioShare routing module ensures that you can ride on a safe bike route. Don't worry, you won't be navigated onto highways.
If you’re not satisfied with the automatically generated route through the route generator. You can easily adjust it.
Customize a route:
- When there is a pink route line displayed on the map, you can use the mouse to move along the route, it will show a white dot.
- Drag the white dot to adjust the route.
To save a route:
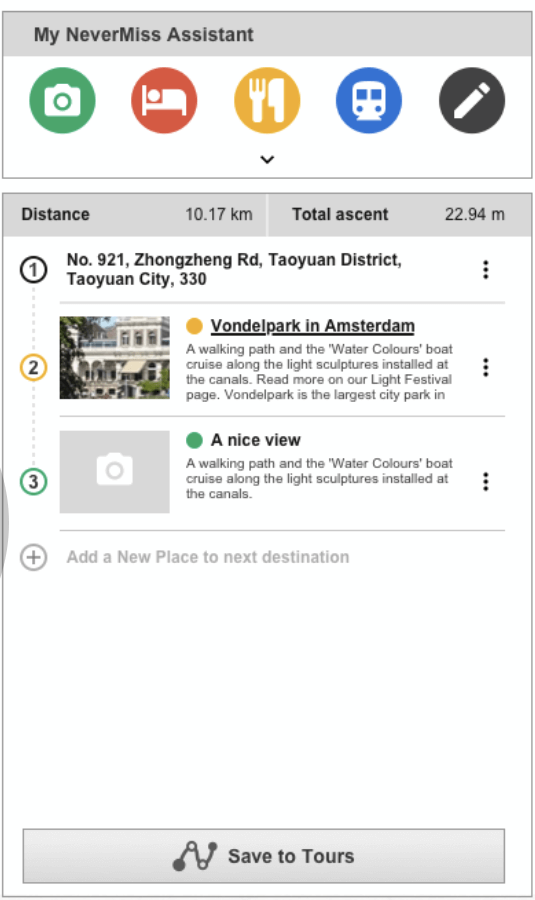
Click the "Save to Tours" button to save the route under Tours.
You can edit the route again at any time.
Edit the route again:
- Find the created route on the "Tours" tab. Click on the name to open the route information page.
- Click the "Edit" button in the upper right to activate edit mode.
Draw a route with multiple stops:
There is a list on the left side of the Create page. Every pinpoint that you draw on the map generates a waypoint on the list. Only if you have categorized the item will it become a POI. The POI becomes the stop and your Cyclo device alerts you when you approach the site with the NeverMiss function.
Editing waypoints:
There are five predefined categories to choose from:
- Tour spot
- Lodging
- Food
- Transport
- Custom
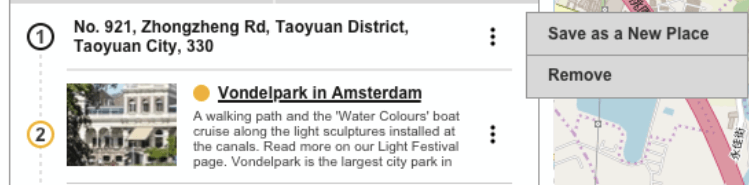
Each waypoint you created on the map shows the address or longitude / latitude of the waypoint. Click the three dot button to save the waypoint as a new place.
Place manager
Place Manager allows you to create your own POIs. It is useful because you can re-use those places while creating a route.
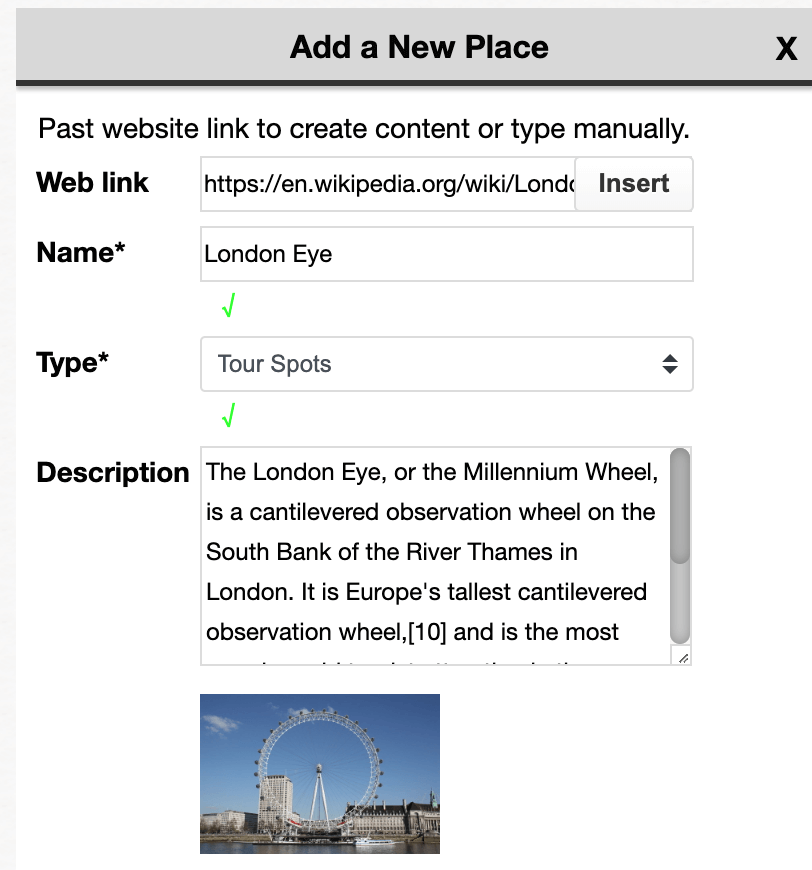
To add a new place:
- By clicking the Place Manager you can switch the function if necessary.
- Click the 'Add a New Place' button
- Enter required fields, they are marked with * sign.
If you found a location information online, such as a wiki or someone's blog post, you can simply copy and paste the link to the Web link column. Clicking the Insert button, will automatically retrieve Name and Description from the website for you. Some websites may not support this function.
NeverMiss
NeverMiss ensures that you don't miss any important points during the tour. If you have created routes with POIs or downloaded routes from RouteYou with MioShare, Cyclo will notify you as soon as you approach the defined points during your journey.
This is very useful for self-guided tours. It turns your Cyclo into a bike notebook.
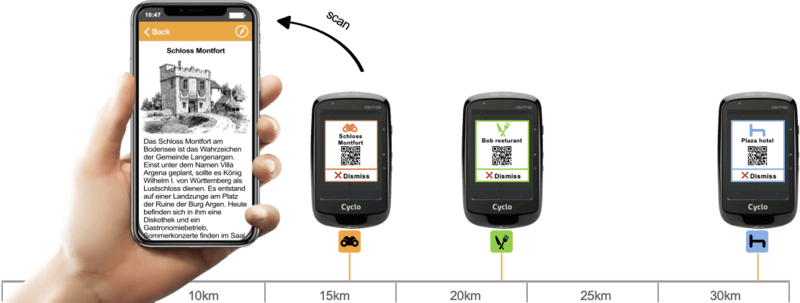
If the POI contains a web link, you will receive a QR code with the NeverMiss notification. Scan the QR code with your smartphone to get a detailed description over the Internet.
Scan a QR code with your smartphone:
Open your camera app and point your device at the QR code for a few seconds. When a notification is displayed, your smartphone can automatically scan QR codes. You may need to select the mode on the camera screen to activate the QR code scanning function.
The automatic QR code reader is only supported by Android 9 or higher versions and iOS 11 or higher versions. If your smartphone has a lower version, you need a third-party QR code reader app to scan QR codes.

Advanced practice
Hiking
The Cyclo Discover Plus has a height graphic in combination with a map view. You can check the height of your current location while navigating.
How to start the hiking navigation?
- Please make sure you already set your Profile to Run & Walk.
- Set a destination by Navigate
- Or use Surprise Me to let Cyclo decide routes for you.
Node network pointer
How to view a node network navigation list.
- Use the MioShare Create function to draw a route with POIs and to set the POI name to the node numbers.
- Save it in Cyclo via WiFi sync (only available for Cyclo Discover Plus) or CycloAgent.
- Tap 'NeverMiss' in the Cyclo start menu.
- Start navigation along the route.
- Switch between map view views by tapping the down arrow button until you see the list.
Fishing
How can you use Cyclo for fishing?
- You can save your favorite fishing spot on MioShare via the 'Create' function at Place manager.
- Create your fishing route.
- Save it on your Cyclo device via WiFi sync (only available for Cyclo Discover Plus) or CycloAgent.
- Start your fishing route with Cyclo device through NeverMiss.
Wildlife Observing
How do you use Cyclo to observe wildlife?
- Find a tour or observation points in magazines, travel guides or on the Internet.
- Plan your tour with the MioShare 'Create' function.
- Transfer them to your Cyclo via WiFi sync (only available for Cyclo Discover Plus) or CycloAgent.
- Your Cyclo uses the 'NeverMiss function to notify you when you are approaching the observation point.

Connected services
Connecting to Komoot or Routeyou service
To get more routes, you can connect MioShare to Komoot or RouteYou.
Connect with Kommot:
- You must first register Komoot account in advance.
- Log in to MioShare, open the account page, navigate to the orange button in the upper right corner of screen
- Select the synchronization settings
- Select "Link my account" next to the Komoot logo.
- Log in to Komoot and click the "Grant access" button
As soon as you see that the account has been successfully linked, the recordings of your Cyclos are automatically synchronized with your Komoot account.
Connect with RouteYou:
- You must first set up a RouteYou account.
- Check your MioShare account mailbox and follow the instructions to complete the connection process.
Your Cyclo's recordings are automatically synchronized with your RouteYou account.
Connect your smartphone to enable hands-free notifications
iPhone users:
For iPhone users, you need to turn on the "Show Notifications" option in the Bluetooth settings to receive text messages on your Cyclo device.
Connect Cyclo to iPhone:
- Open the Settings menu on your iPhone
- Select Bluetooth
- Turn on Bluetooth
- Cyclo will be recognised and displayed on the list.
- Tap on Cyclo-Icon and wait for the connection process to be completed.
Android smartphone users:
By default, you will be notified when receiving an incoming call or a text message arrives.
Connect Cyclo to an Android smartphone:
- Download the CycloSmart app from Google Play
- Follow the applications instructions to connect your Cyclo
Maintaining your device
Maintaining your device
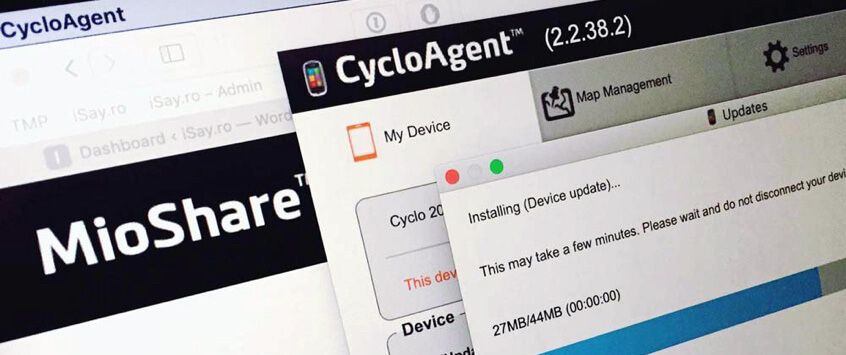
Download and install the computer software:
Mio offers its Cyclo customers a free map update and an update of the device software. The map file is very large. Therefore, you must first download computer software in advance.
How to download the computer software:
- Open your browser and enter www.mioshare.com as URL.
- Log in, If you don't have an account yet, create a new one.
- After logging in there is an orange button with your account name in the upper right corner.
- Click the "Account" button and choose "Help".
- There is a "Download" button in the lower right corner of the help page. Click on it to download the computer software.
- Install the application on to your computer. (CycloAgent MAC installation)
Connect your Cyclo:
- Make sure you have an active internet connection when you use the tool.
- Turn your device over and then connect it to the computer. If requested, select the Connect to PC option.
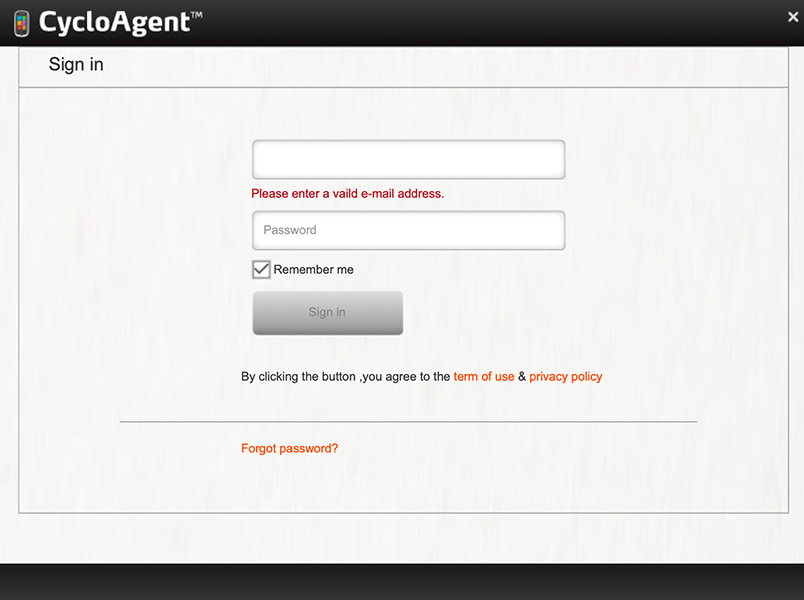
- Log in with your MioShare account details and then click on Sign in.
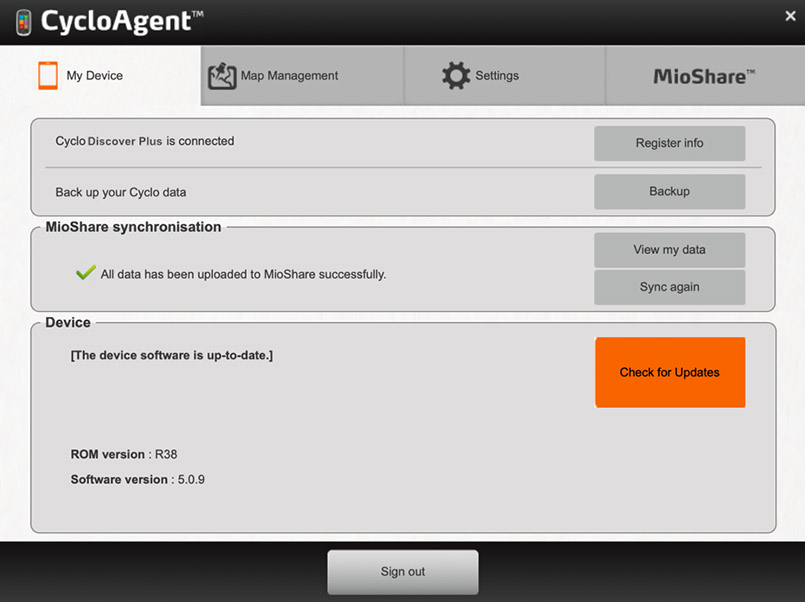
Register Cyclo:
- Click the My Device tab to view the device connection status. If you have not yet registered your Cyclo device, click Register for registration.
- When prompted, click OK to close the notification window.
- You will see the Register button changed to Registered info with an additional Backup button.
Note: The device registration does not mean that the product warranty has been registered. Refer to the product registration section for product registration.

Synchronize data with MioShare:
The computer software automatically uploads your recordings to MioShare and downloads tracks from MioShare.
Click the "Check for Update" button to check for new updates. When an update is made, a notification window opens automatically. Click "Update" to start the update.
Warranty Registration
By default you'll receive a 2 year warranty
Don't forget to register your device on the Mio website to activate your warranty
- Go to Mio.com
- Select your country in the top right corner
- Click on the Register / Login button in the top right corner.
- After logging in, click the same button again and choose 'My Account'.
- Select 'My Devices' on the left side of the account page.
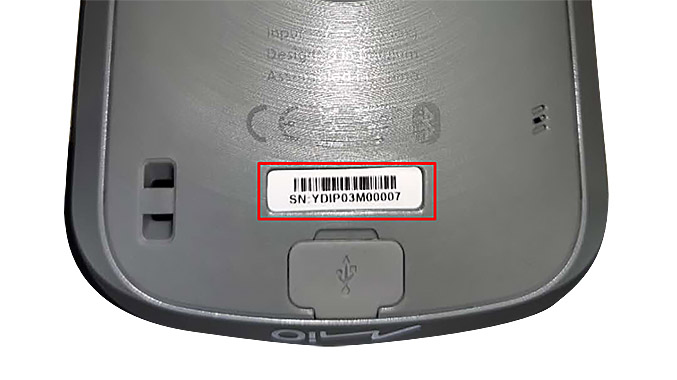
- Enter the required information and click on the Add button. The serial numbers are on the back of your Cyclo device.

Unlocking the screen
Your device will automatically lock the screen after 30 seconds (by default) of inactivity. When the screen is locked, press the POWER button briefly to unlock the screen.
You can change the screen lock setting by tapping Main menu > Settings > System > Screen > Screen Lock Timer.